
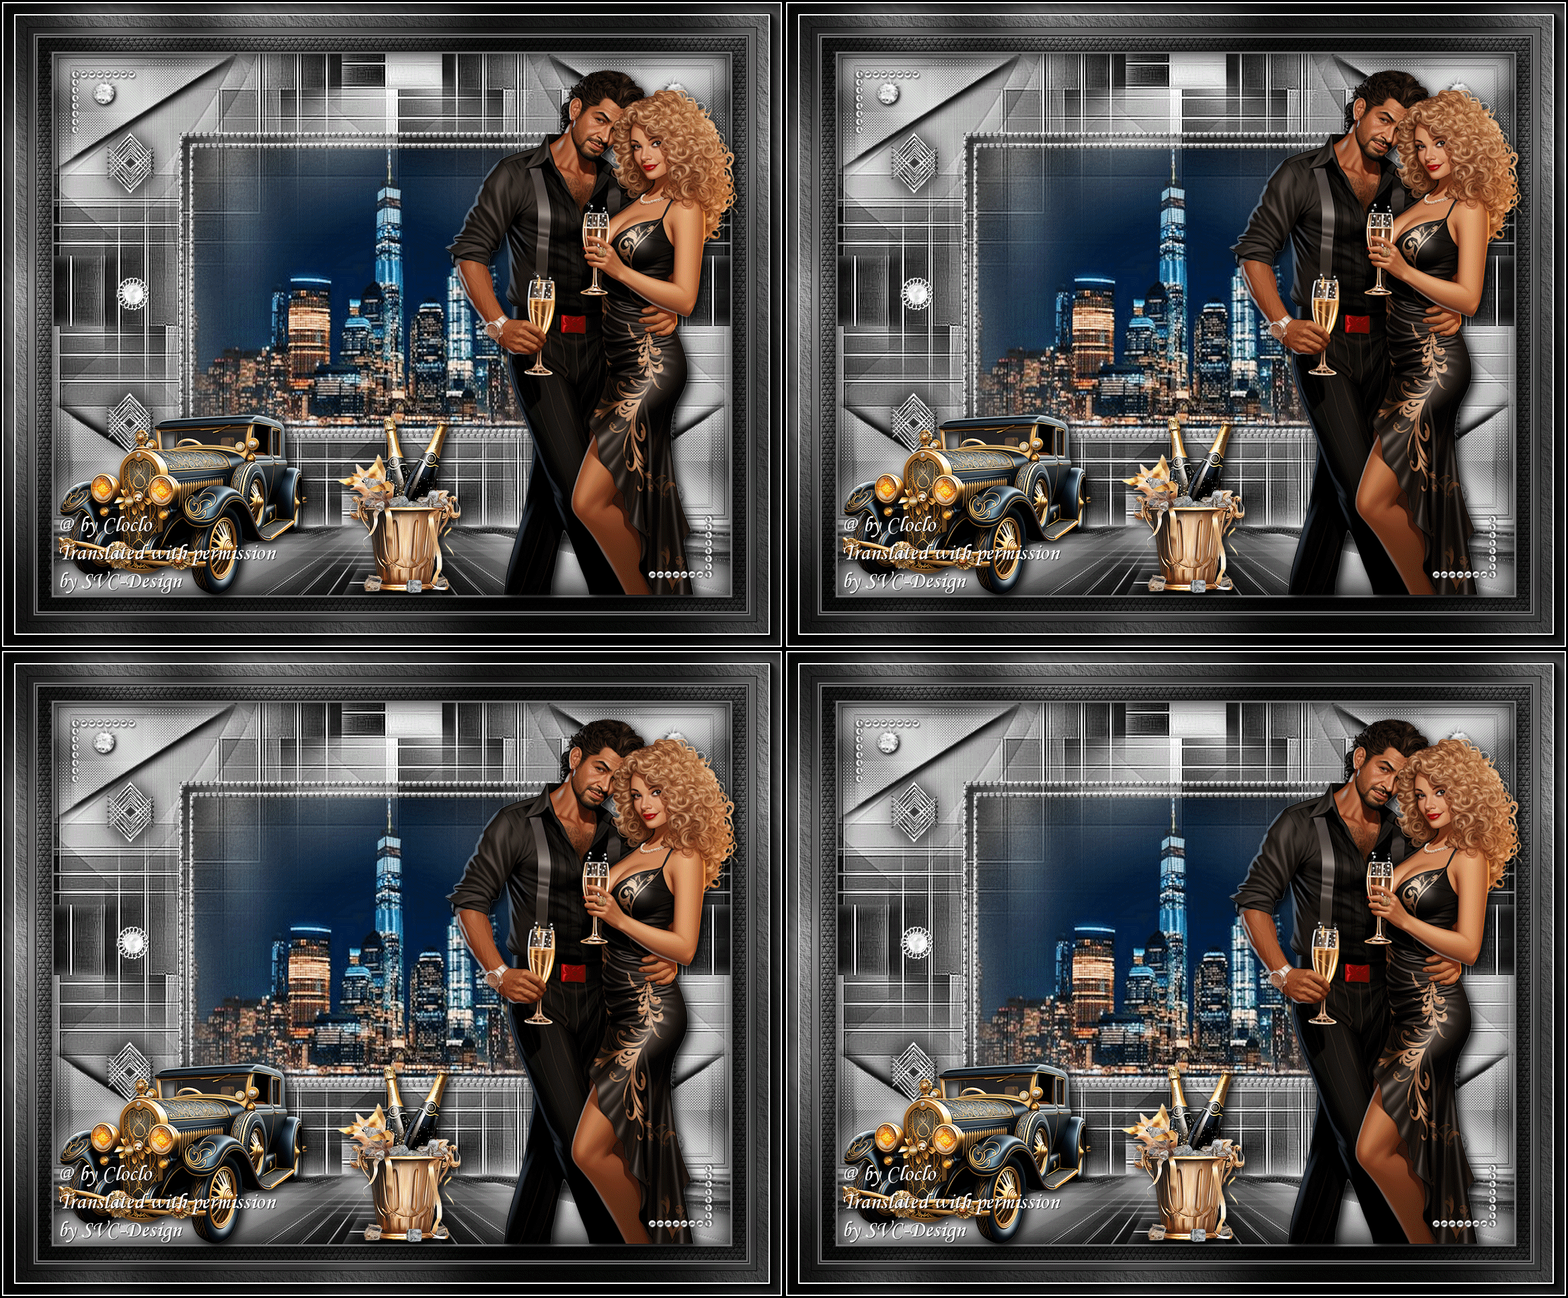
This lesson is made with PSPX9
But is good with other versions.
© by SvC-Design

Materialen Download :
Here
******************************************************************
Materials:
alpha_bonne_anne2024.pspimage
bulles.mng
cadre.pspimage
coins.png
couple.png
deco cloclo 2.png
deco cloclo.png
deco cloclo1.png
fond.jpg
Maskre01.jpg
palette.png
seau champagne.png
ville.png
voiture.png
******************************************************************
Plugin:
Effects - plugin - MuR'a Filter Meister - Perspective Tilling
Effects – plugin - AP 01 [ innovations] - Lines - SilverLining - Mixing
Effects - plugin - AAA Frames - FOTO Frame
Effects - plugin - Graphics plus - Croos Shadow
******************************************************************
color palette
:

******************************************************************
methode
When using other tubes and colors, the mixing mode and / or layer coverage may differ
******************************************************************
General Preparations:
First install your filters for your PSP!
Masks: Save to your mask folder in PSP, unless noted otherwise
Texture & Pattern: Save to your Texture Folder in PSP
Selections: Save to your folder Selections in PSP
Open your tubes in PSP
******************************************************************
We will start - Have fun!
Remember to save your work on a regular basis
******************************************************************
1.
Foreground color # ffffff
Background color # 000000
Open alpha_bonne_anne2024.pspimage
Window - duplicate
Minimize the original - we are working on the copy
Open fond.jpg
Selection - Select All
Edit – Copy
Edit - Paste into selection
Selection - Select None
Layers - New Raster Layer
fill it with #ffffffffff
2.
Open the mask Masker01
Layers - New Mask Layer - From Image - Maskre01.jpg

Effects - Edge Effects - Enhance More
Layers - Merge - Merge Group
Layers - Merge - Merge visible layers
Layers - Duplicate
Image - Resize to 85%
No check mark on resize all layers
Effects - 3 D effects - Drop shadow
0/ 0 / 80 / 30 - Color #808080
Effects - Image Effects - Seamless Tiling
3.
Layers - Duplicate
Image - Mirror – mirror Horizontal
Opacity at 75
Layer – merge – merge all (flatten)
Adjust – scharpness – scharpen more
Image - Resize

Layers - Duplicate
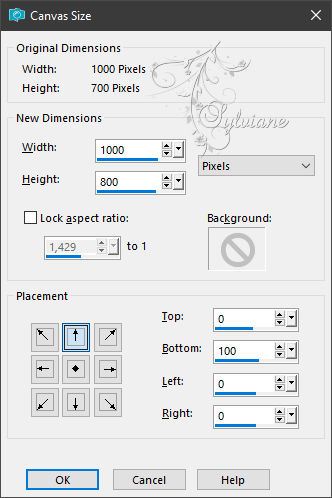
Image – canvas size
4.
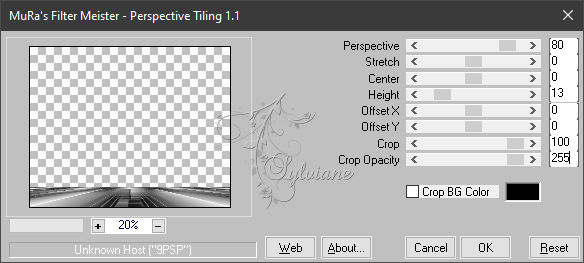
Effects - plugin - MuR'a Filter Meister - Perspective Tilling
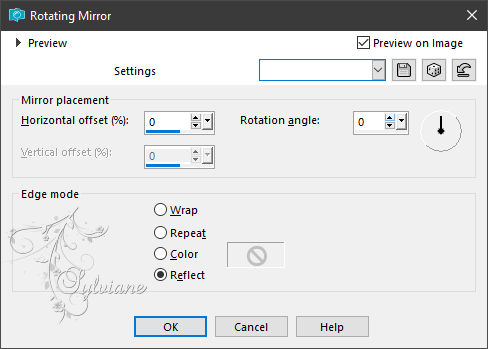
Effects – reflection effects – rotating mirror
Effects - 3 D effects - Drop shadow
5 /5 / 100 / 55 - Color c0c0c0
Layers - Merge - Merge visible layers
Open deco cloclo.png
Edit - Copy
Go back to your tag
Edit - Paste as new layer
Layers - arrange – up
Blendmode : Overlay
Opacity: 80
Effects - Edge Effects - Enhance
Activate the bottom layer
5.
Selections - Load / Save - Load selection from Alpha Channel - Cloclo1

Selections – Promote selections to layer
Layers – arrange – bring to top
Prepare a Linear Gardient

Fill with the gradient
Adjust - blur - gaussian blur
Radio: 35
Effects – plugin - AP 01 [ innovations] - Lines - SilverLining - Mixing

Effects - plugin - AAA Frames - FOTO Frame
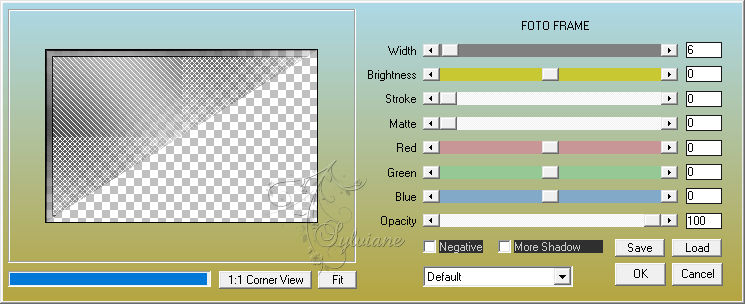
Adjust – scharpness – scharpen
Effects - 3 D effects - Drop shadow
0/ 0 / 100 / 20 - color:#000000
Selection - Select None
6.
Lays duplicate
Image - Resize to 80 %
Activate selection tool (Press K on your keyboard)
And enter the following parameters:
Pos X : 24 – Pos Y : 17
Press M.
Layers – merge – merge down
Layers - Duplicate
Image - Mirror – mirror Horizontal
Layers – merge – merge down
Layers - Duplicate
Image - Mirror - Vertical Mirror
Activate selection tool (Press K on your keyboard)
And enter the following parameters:
Pos X : -2 – Pos Y : 498
Press M.
Layers – merge – merge down
Open deco cloclo1.png
Edit - Copy
Go back to your tag
Edit - Paste as new layer
Activate selection tool (Press K on your keyboard)
And enter the following parameters:
Pos X : -1 – Pos Y : 89
Press M.
Effects - Edge Effects - Enhance
Blendmode: Luminace
7.
Open deco cloclo 2.png
Edit - Copy
Go back to your tag
Edit - Paste as new layer
Activate selection tool (Press K on your keyboard)
And enter the following parameters:
Pos X : 49 – Pos Y : 33
Press M.
Blendmode: Luminace
Activate the bottom layer
Selections - Load / Save - Load selection from Alpha Channel – Cloclo
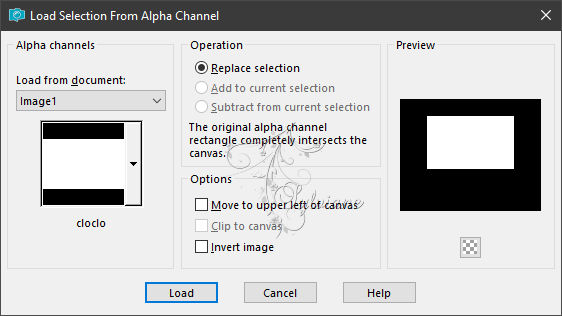
Selections – Promote selections to layer
Layers – arrange – bring to top
Adjust - Add / Remove Noise - Add Noise
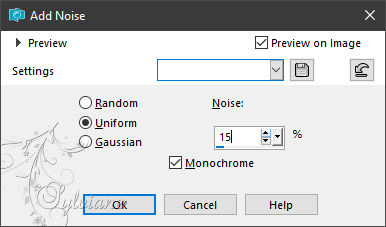
8.
Effects - plugin - Graphics plus - Croos Shadow - Default
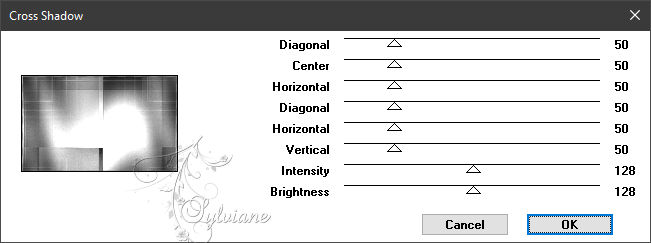
Selections - modify - select selection borders
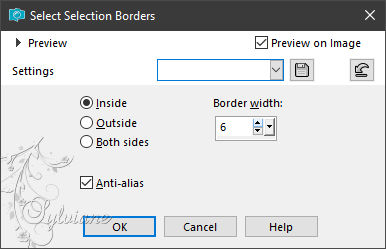
fill it with #ffffffff'
Effects - Texture Effects - Tiles

9.
Effects – 3D effects – inner bevel
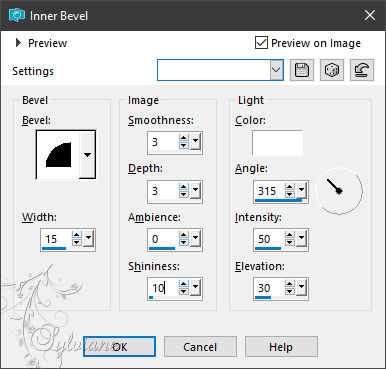
Selections – Promote selections to layer
Selection - Select None
Image - Resize to 95%
No check mark on resize all layers
With the magic wand / Tolerance 0 / Center click

Open ville.png
Edit - Copy
Go back to your tag
Edit - Paste as new layer
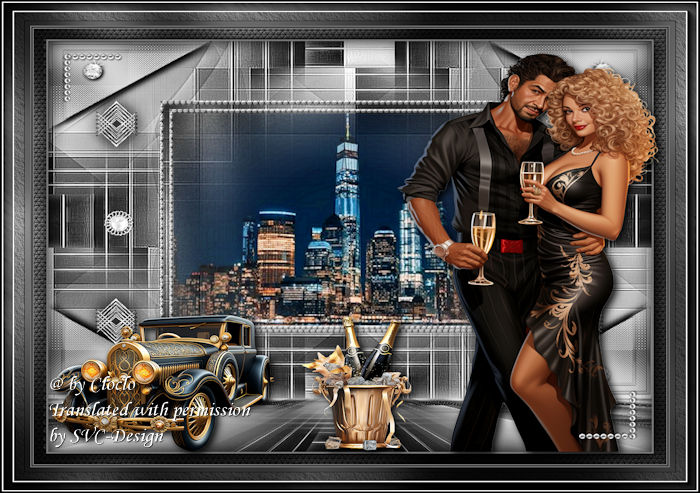
Place well - See final
10.
Selections - Invert
Click on the key Delete your keyboard
Selection - Select None
Adjust – one step photo fix
Layer – merge – merge all (flatten)
Edit - Copy
Open cadre.pspimage
Edit - Paste into selection
Layers - New Raster Layer
Effects - 3D effects – Cutout
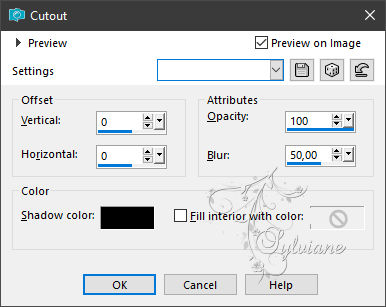
Selection - Select None
11.
Layer – merge – merge all (flatten)
Adjust – scharpness – scharpen
Open couple.png
Edit - Copy
Go back to your tag
Edit - Paste as new layer
place as in the example
open seau champagne.png
Edit - Copy
Go back to your tag
Edit - Paste as new layer
place as in the example
open voiture.png
Edit - Copy
Go back to your tag
Edit - Paste as new layer
Effects - 3 D effects - Drop shadow - as before
Open coins.png
Edit - Copy
Go back to your tag
Edit - Paste as new layer
Do not move
Put my copyright and sign
Layer – merge – merge all (flatten)
Image - Resize to 1000 pixels wide X By 800 from top in Unsticking/Locking the proportions
Register in JPG
If you want to animate it you have a bubble gif in the material
Back
Copyright Translation 2023 by SvC-Design
------------------------------------------------------------------------------
Thanks to all who created
 |
| |
| |
| |
| |
| |
| |
| |
| |
| |
| |
| |
| |
| |
| |
| |
| |
| & |
| |
|